Using Entity Framework 6 with Database-First approach for SQLite Database in Visual Studio 2019
Using Entity Framework 6 Designer with Database-First approach (creating EDMX file) for SQLite Database in Visual Studio 2019 is a bit tricky. Below are steps you need to follow to be successful.
The key point to be successful is to use the same version of System.Data.SQLite in all steps. I use 1.0.114.x here at the time I am writing this post.
Step 1. Install System.Data.SQLite package
-
Download sqlite-netFx46-setup-bundle-x86-2015-1.0.114.0.exe from System.Data.SQLite Downloads (notes 1.0.114.0 at the end of file name, it is version of System.Data.SQLite)
In case you need to use different version than mine, you need to select a package with the note: “This is the only setup package that is capable of installing the design-time components for Visual Studio 2015.”. If not, you will not be able to create model from SQLite database using EF6 Designer.

-
Run the downloaded file
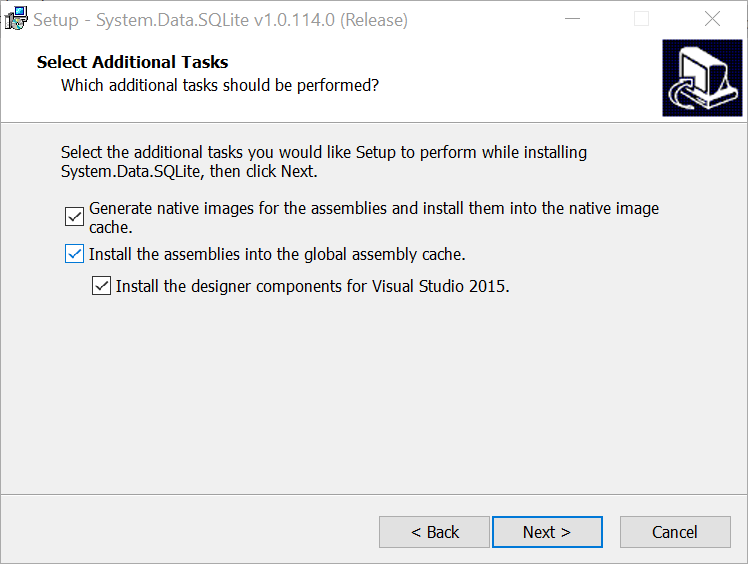
sqlite-netFx46-setup-bundle-x86-2015-1.0.114.0.exeas Administrator to setup, select Full installation and check all checkboxes in the Select Additional Tasks dialog.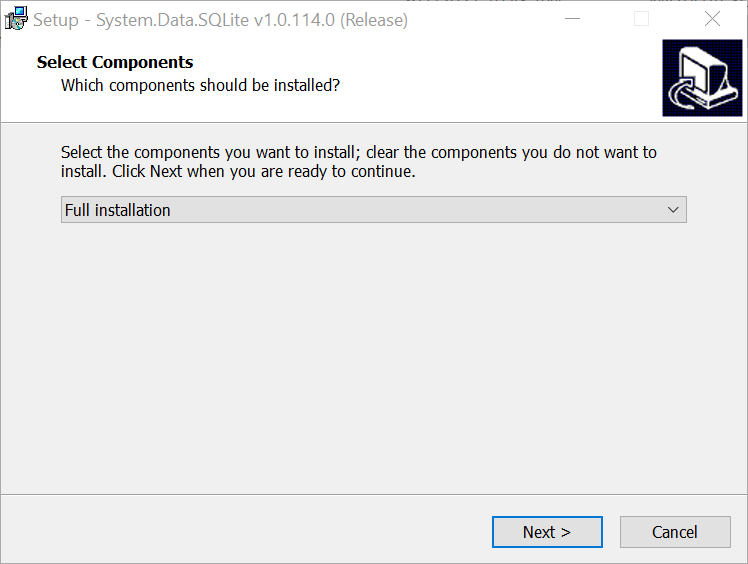
Step 2. Install SQLite and SQL Server Compact Toolbox Extension to Visual Studio 2019
-
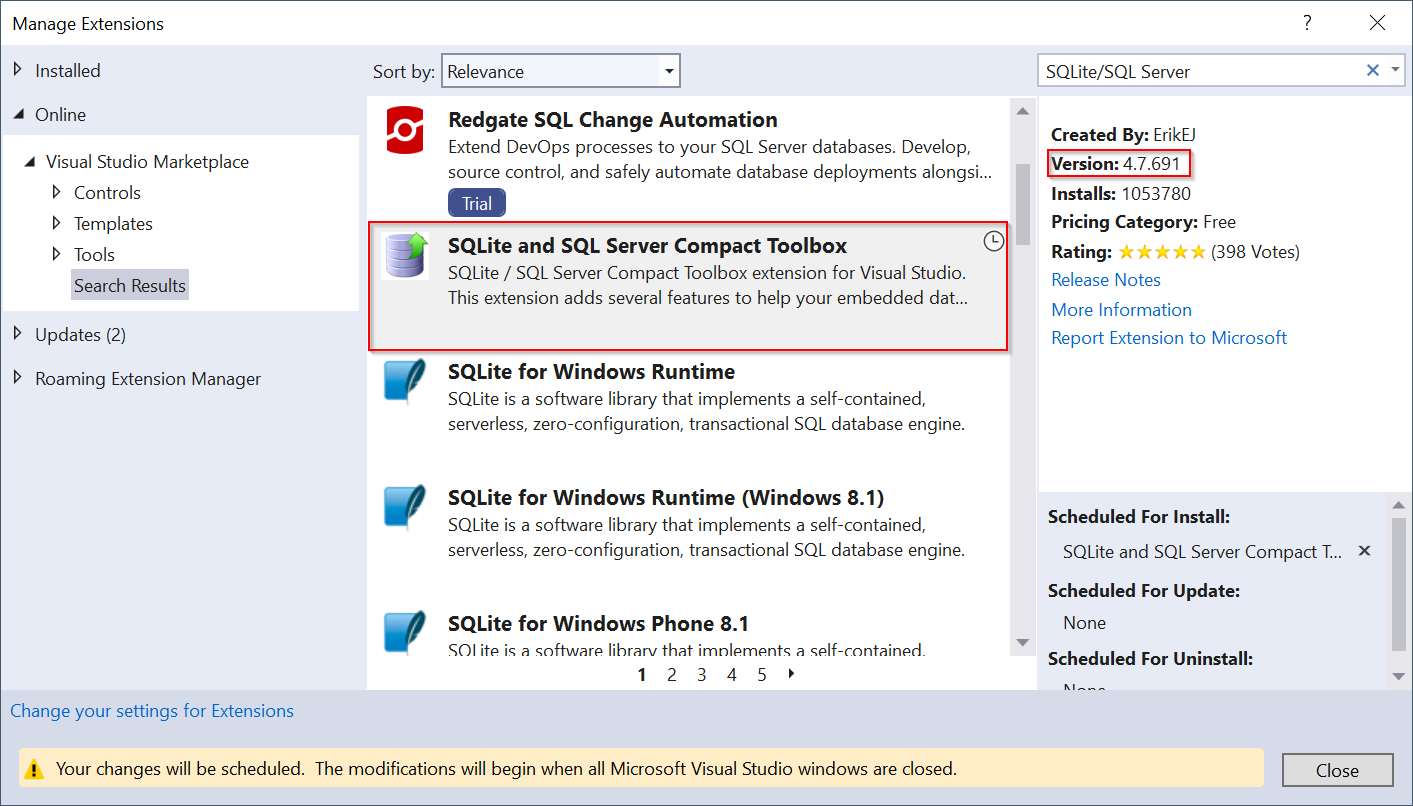
Open Visual Studio 2019, search and insall the extension named SQLite and SQL Server Compact Toolbox. I used version 4.7.691. Restart Visual Studio to apply changes.
Step 3. Create a new project
-
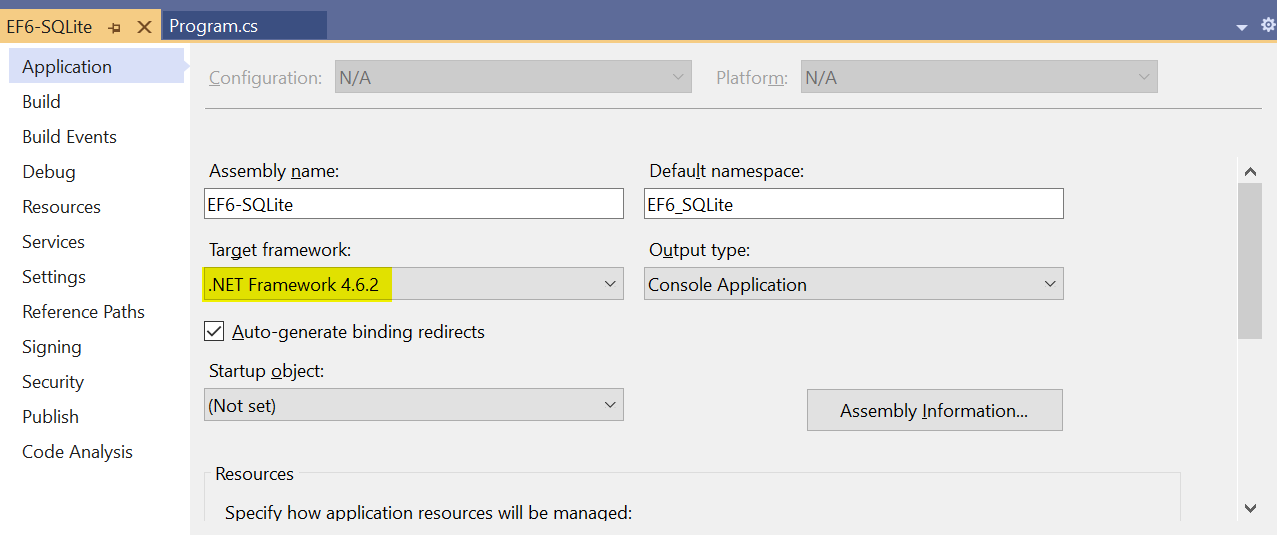
Open Visual Studio 2019, create a new Console Application project with Target framework = .NET Framework 4.6.2
Step 4. Install NuGet Packages
-
In the newly created project, open the NuGet Package Manager window for the project
-
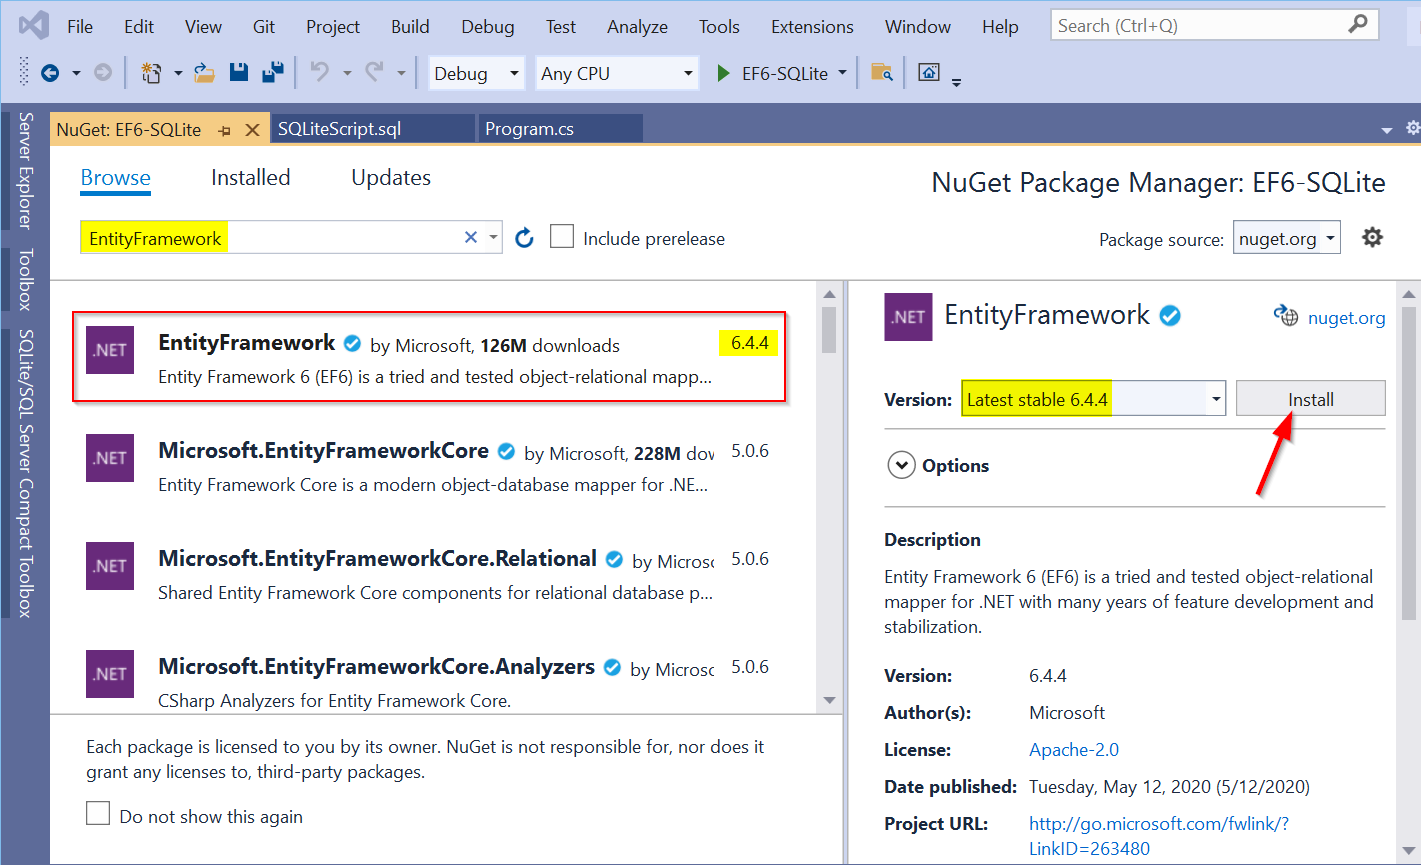
Search and install EntityFramework 6.4.4
-
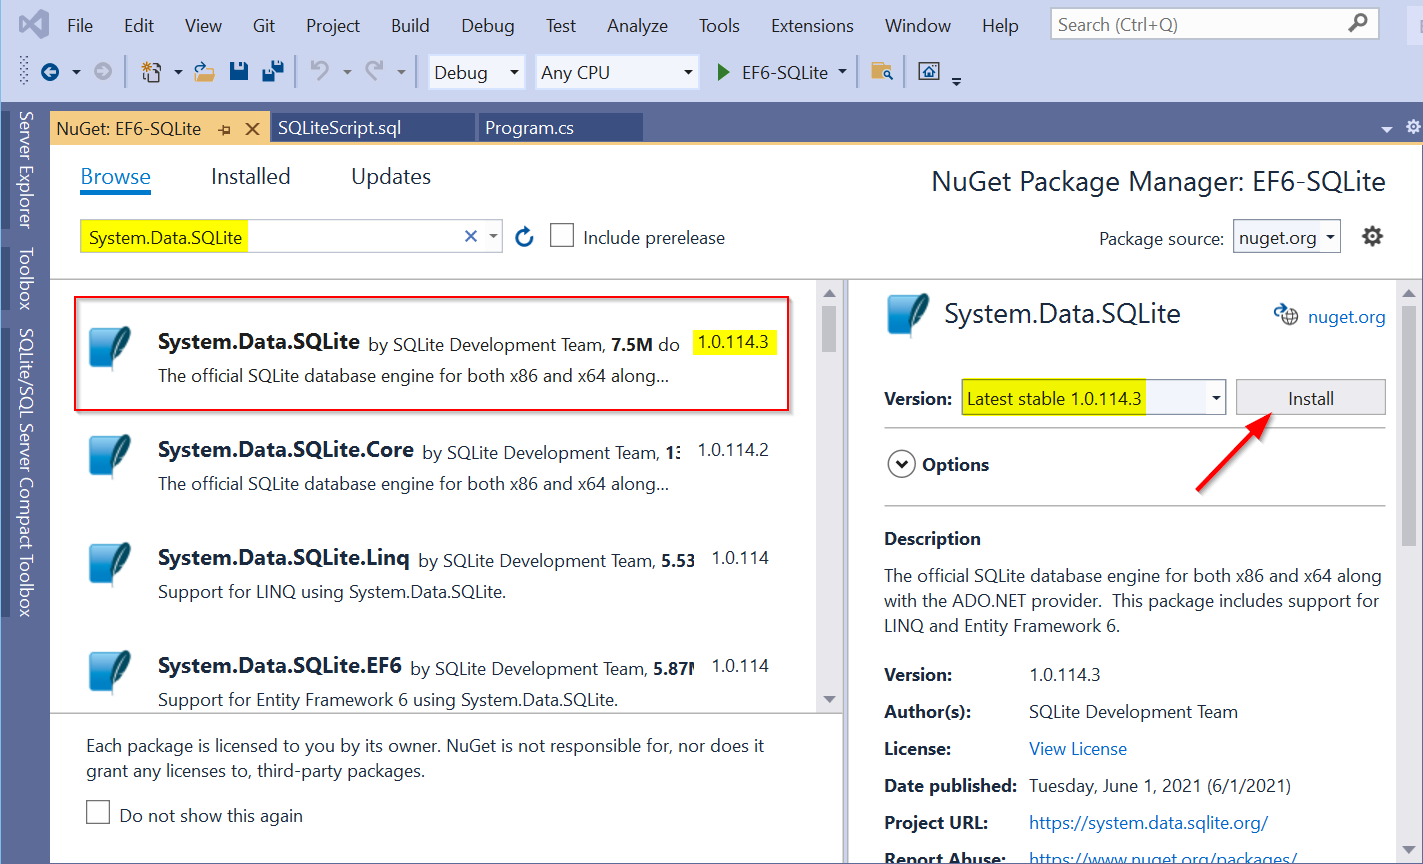
Search and install System.Data.SQLite 1.0.114.3 (I should have used the same version of System.Data.SQLite that I used in Step 1, but I cannot find out that one, so I used 1.0.114.3 instead, and it worked because it is just a different build, I think)
Step 5. Connect to SQLite database
-
Copy sample SQLiteDB.db file from here (or you can create your own one from https://sqliteonline.com) to the project folder
-
In Visual Studio 2019, click Tools -> SQLite/SQL Server Compact Toolbox to open SQLite/SQL Server Compact Toolbox window
-
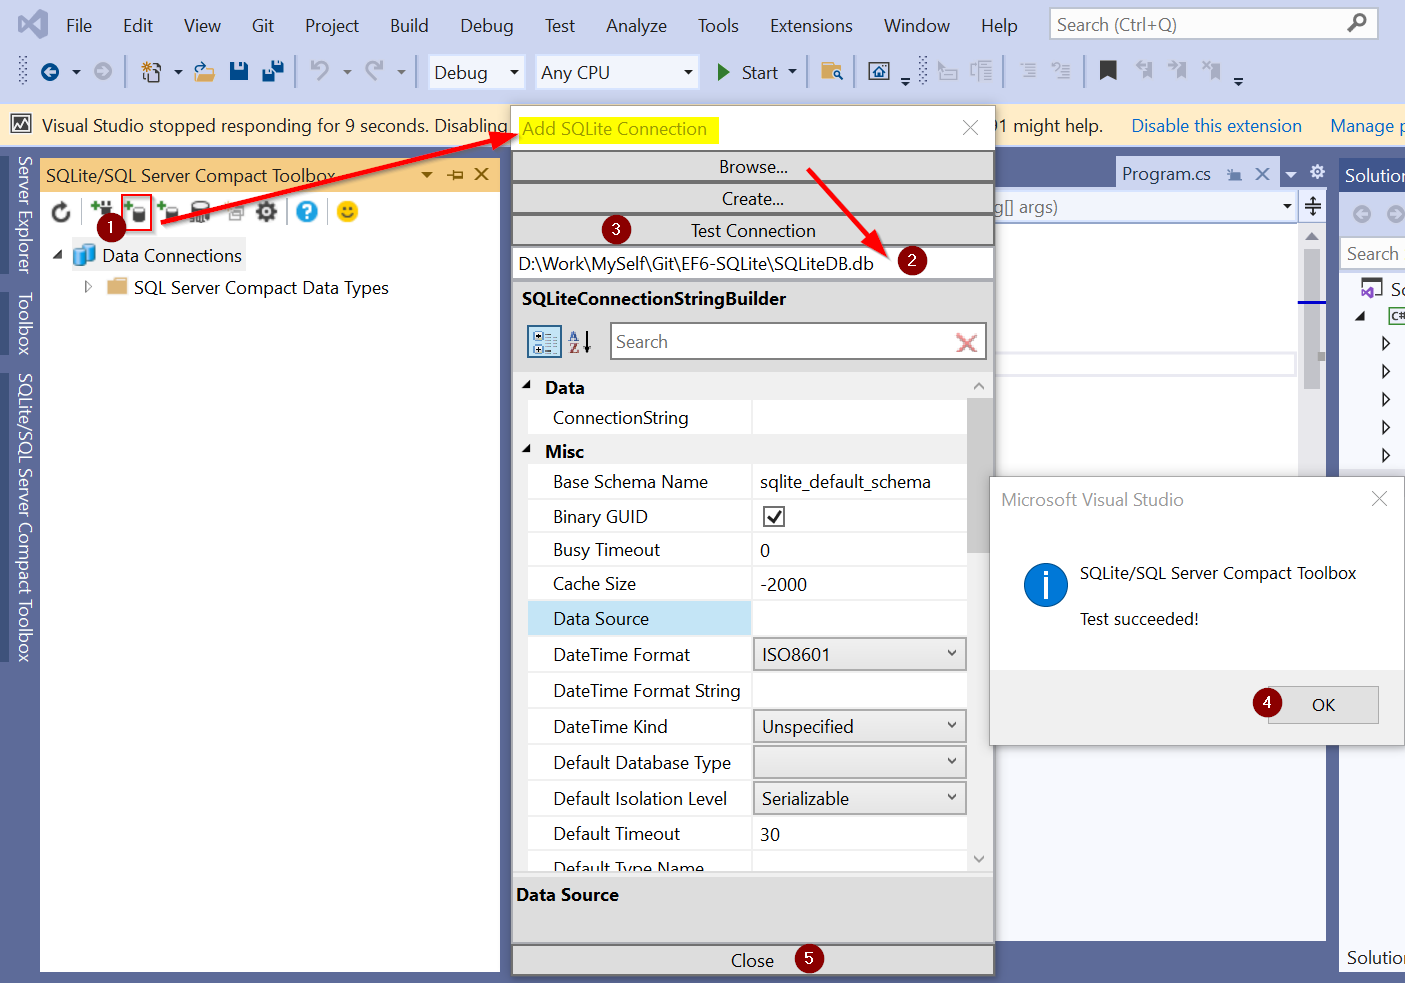
In the SQLite/SQL Server Compact Toolbox window, (1) select Add SQLite Connection…, (2) browse or enter the path pointing to the SQLiteDB.db file you just copied to your project folder, (3) click Test Connection button. You should see message of “Test succeeded!”. (4) hit OK and (5) Close to save the changes.
Step 6. Create EDMX file
-
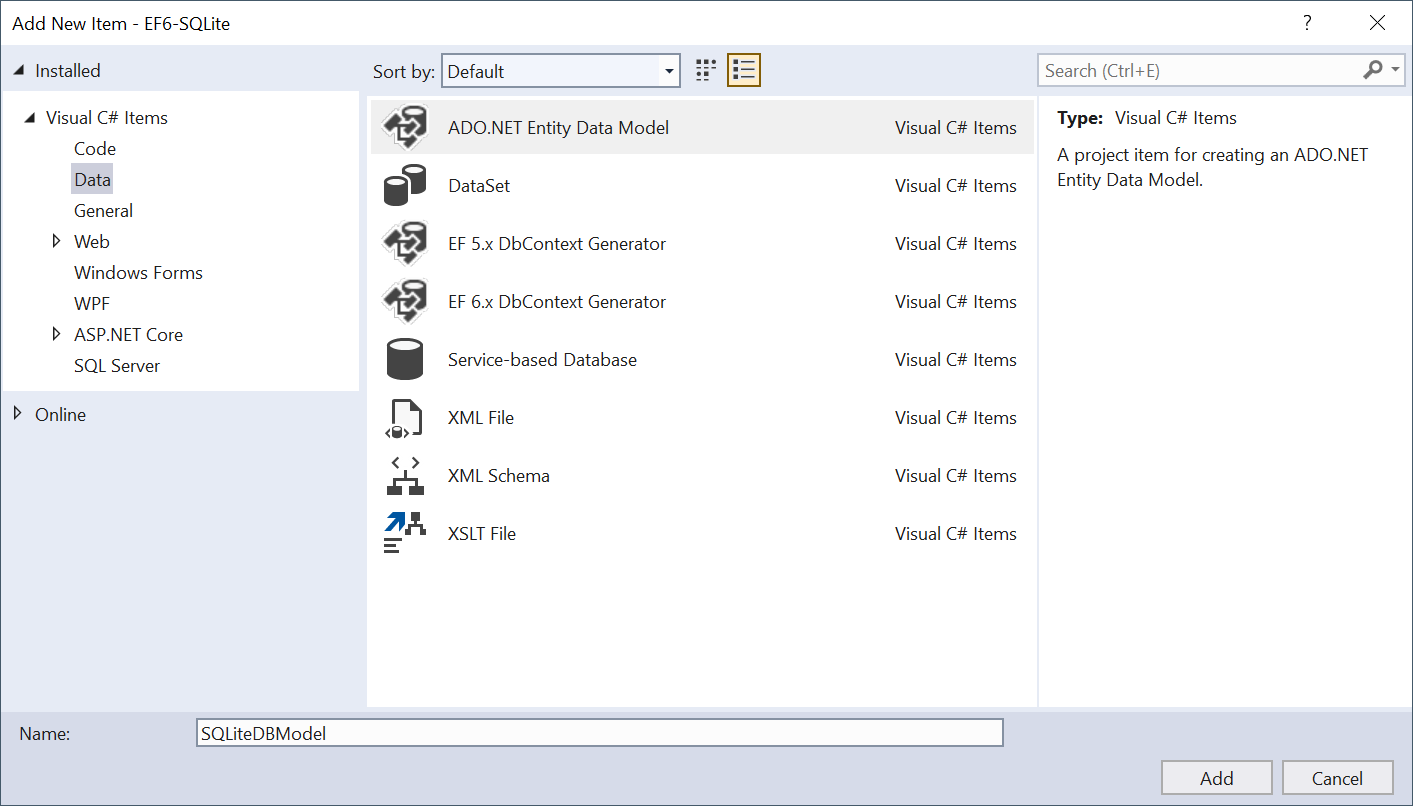
In Solution Explorer window of Visual Studio, select Add -> New Item… -> ADO.NET Entity Data Model, enter the name for the Model and click Add button.
-
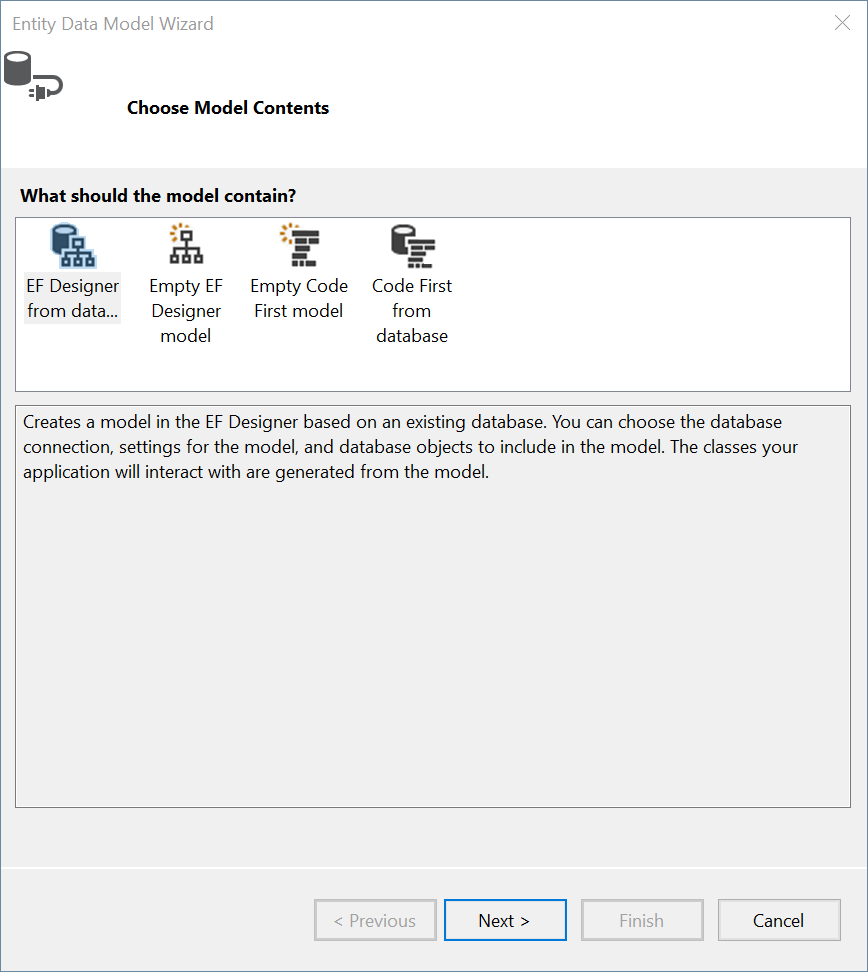
In the Choose Model Contents step of Entity Data Model Wizard, select EF Designer from database
-
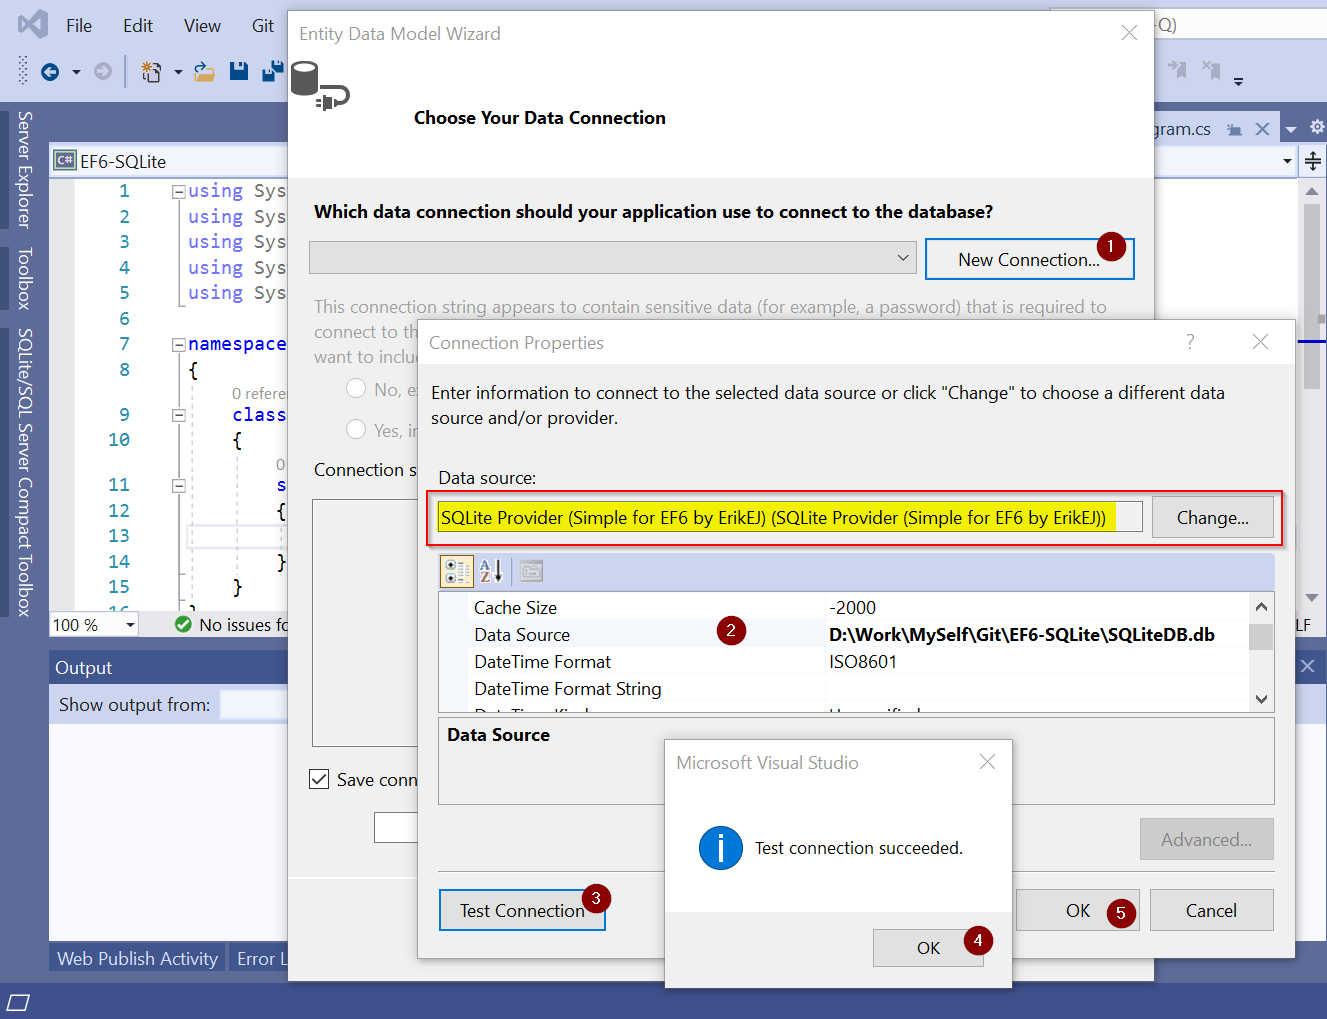
In the Choose Your Data Connection step, (1) select the New Connection… button. Make sure that the SQLite Provider is selected, if not, click the Change button to select the correct one. (2) enter the correct path to the SQLiteDB.db file in your project folder. (3) click the Test Connection button, you should see the message of “Test connection succeeded.” (4) click the OK button to close the message window. (5) click the OK button.
-
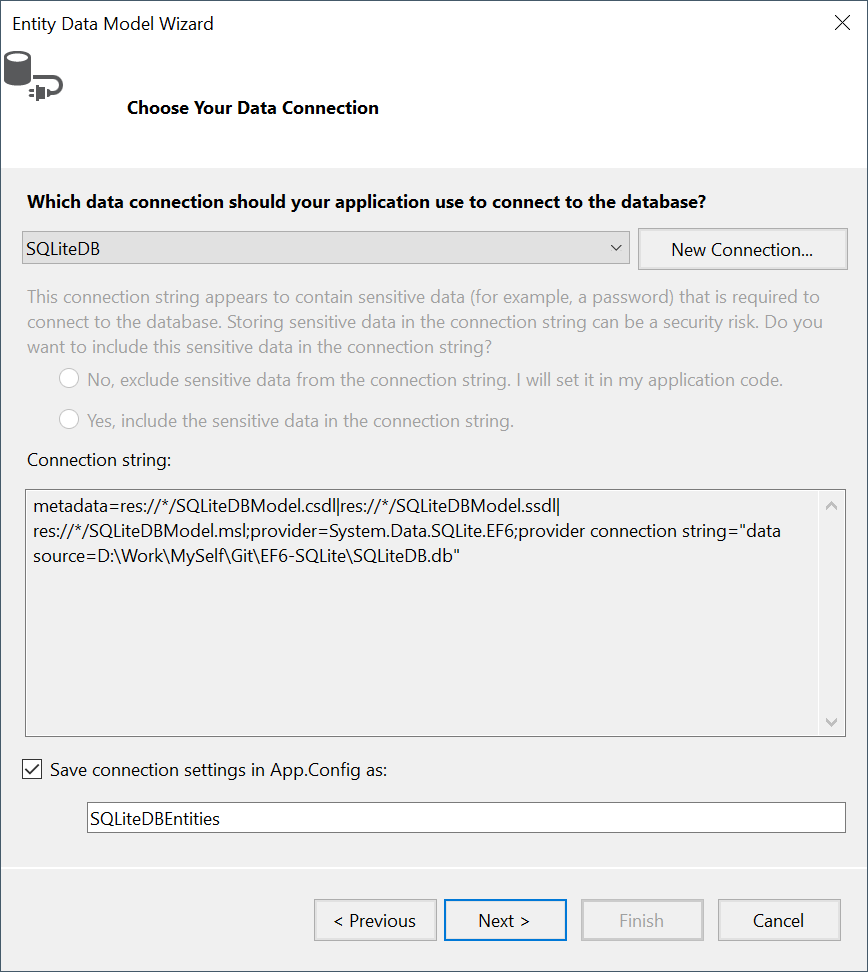
Check the Save connection settings in App.Config as checkbox, enter the name and click the Next button.
-
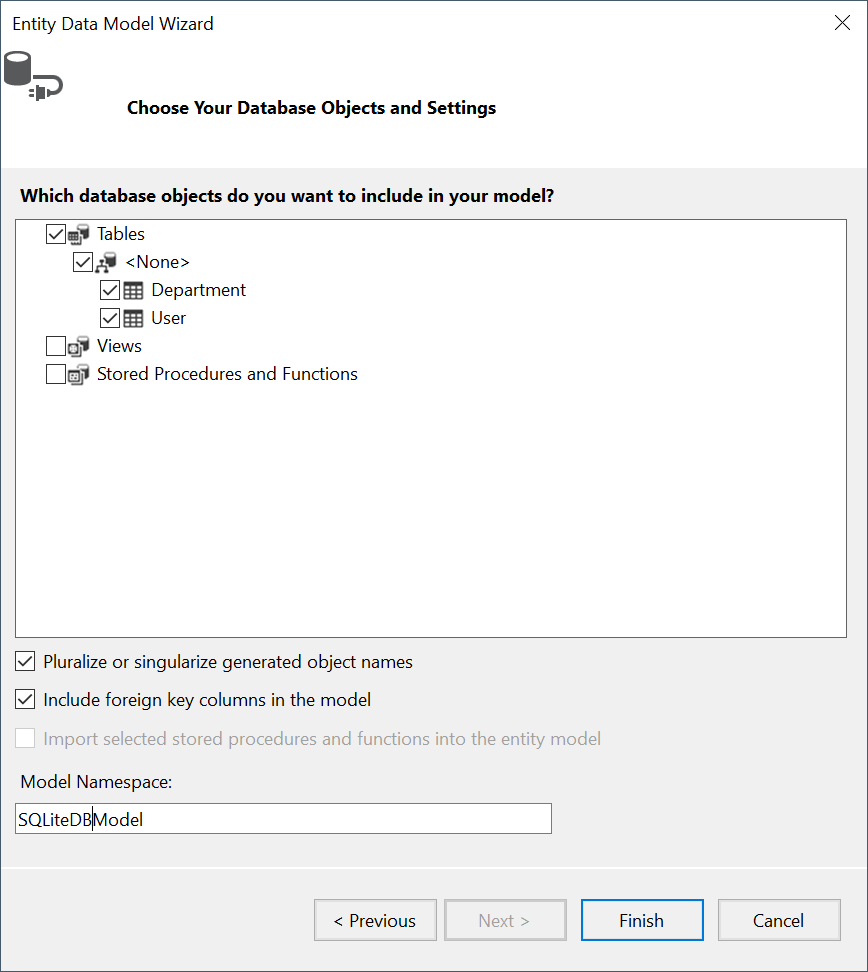
In the Choose Your Database Objects and Settings step, select Tables that you want do model, enter Model Namespace, then click the Finish button.
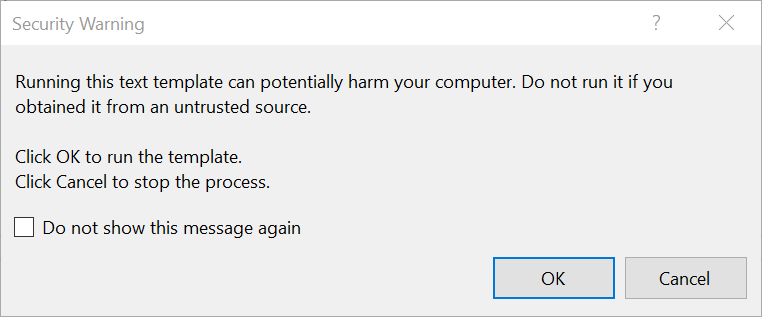
Click OK if you are asked something about Security Warning like below (maybe 02 times)
-
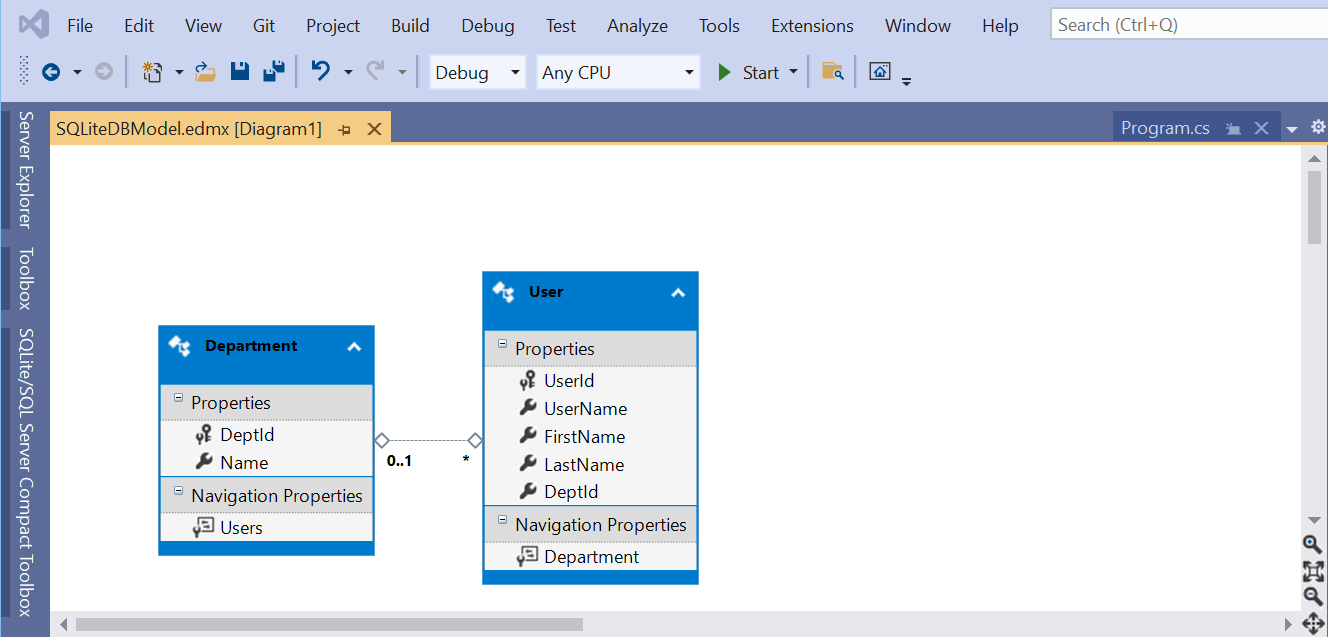
Here is the result in EDMX file
Step 7. Create code to query data from SQLiteDB.db using Entity Framework
Create simple code lines to query data from the sample SQLite database file (contains 02 simple tables, Department and User, with Department one-to-many User relationship) using SQLiteDBEntities we just created in the above steps. This is to verify the connection to SQLite database using EF6
using System;

namespace EF6_SQLite
{
    class Program
    {
        static void Main(string[] args)
        {
            var db = new SQLiteDBEntities();

            foreach(var dept in db.Departments)
            {
                Console.WriteLine($"DeptId: {dept.DeptId}, DeptName: {dept.DeptId}");

                foreach(var user in dept.Users)
                {
                    Console.WriteLine($"         UserId: {user.UserId}, UserName: {user.UserName}, FirstName: {user.FirstName}, LastName: {user.LastName}");
                }
            }

            Console.ReadLine();
        }
    }
}
Start the project. Oops… the error happens
System.InvalidOperationException: ‘No Entity Framework provider found for the ADO.NET provider with invariant name ‘System.Data.SQLite’. Make sure the provider is registered in the ‘entityFramework’ section of the application config file. See http://go.microsoft.com/fwlink/?LinkId=260882 for more information.’

Step 8. Fix error
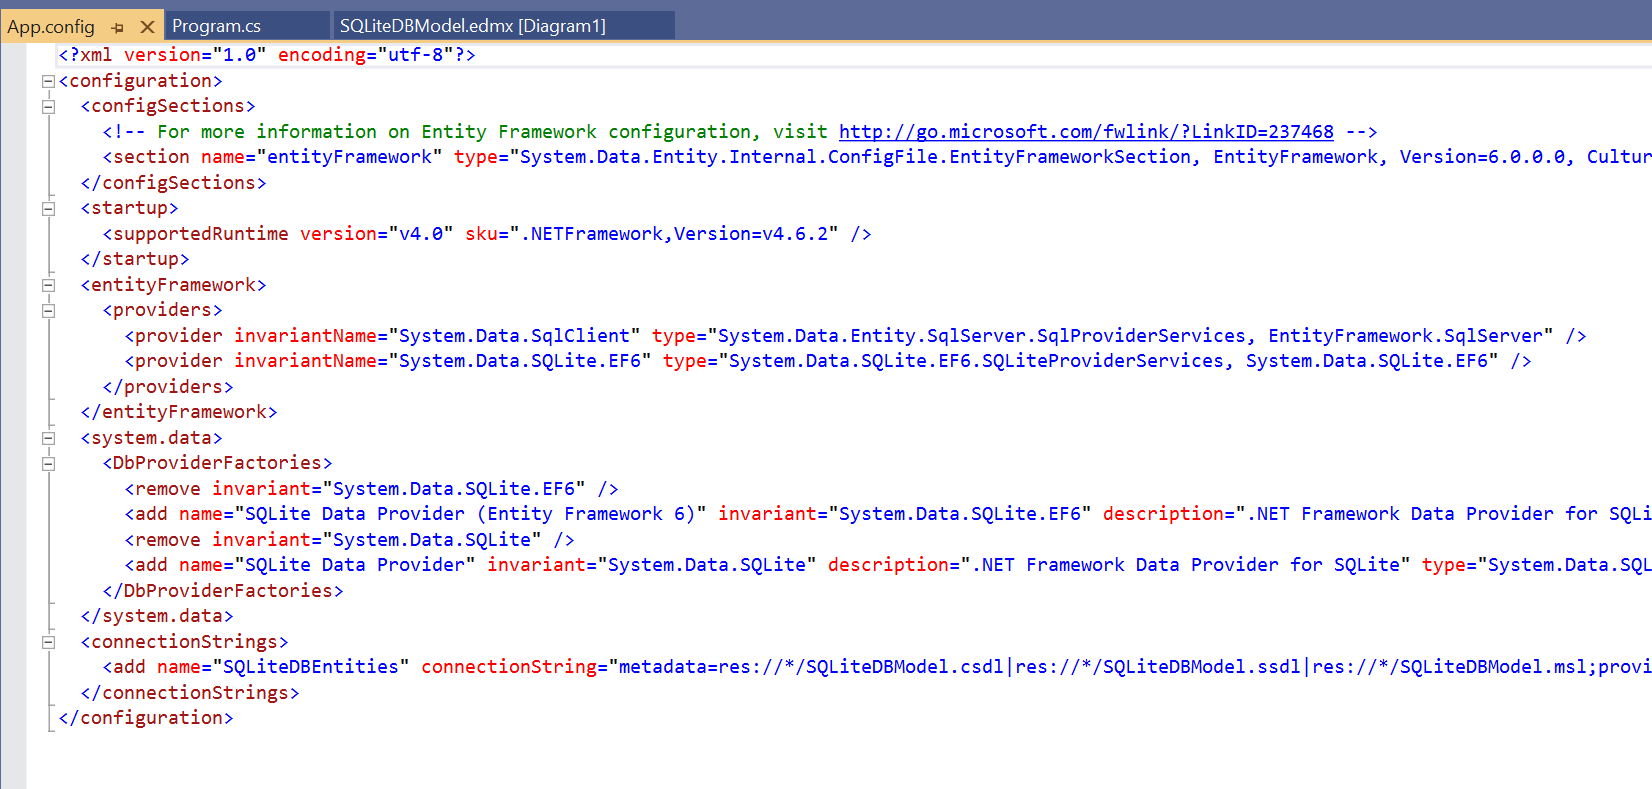
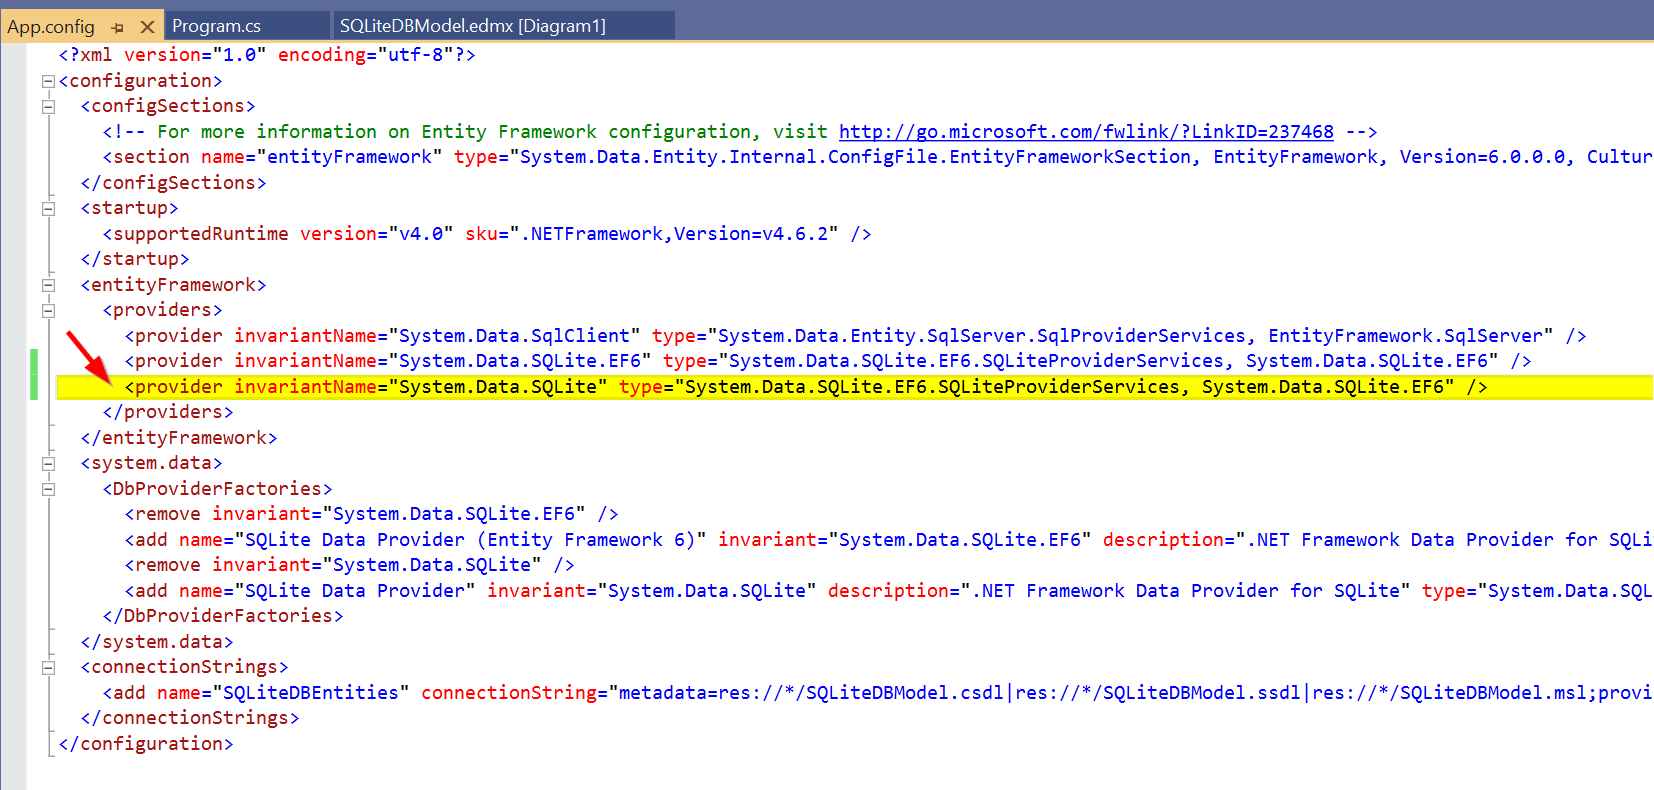
Open the App.config file, this is the original App.config file created/updated by EF6. Add the below line to the entityFramework\providers section
<provider invariantName="System.Data.SQLite" type="System.Data.SQLite.EF6.SQLiteProviderServices, System.Data.SQLite.EF6" />
The App.config file BEFORE changes
The App.config file AFTER changes
Start the project again. Here we go. It is working now.

Download sample source code from GitHub
References
- https://stackoverflow.com/questions/58767771/cant-get-sqlite-to-work-in-vs2019-with-ef6
- https://stackoverflow.com/questions/29129796/no-entity-framework-provider-found-for-ef-6-and-sqlite-1-0-96-0
Hope it helps.
💬 Comments
Post a comment on GitHub